Anycubic i3 mega controller board replacement
18 April 2020 on maker. 1 minute
Recently, the heatbed of my beloved Anycubic I3 mega stopped working. The 3d printer is a tool I use quite often to mak replacement parts, build enclosures for small IoT projects or to create helpful tools I can use for woodworking. When checking the controller board, I quickly found, that the mosfet controlling the heatbed was defect. Since I wanted to get my printer running again quickly, and I didn’t have a matching mosfet at hand, I decided to order a new controller board from Amazon instead of trying to replace it first. Unfortunately, it was a bit more difficult to get it working then I was hoping for.
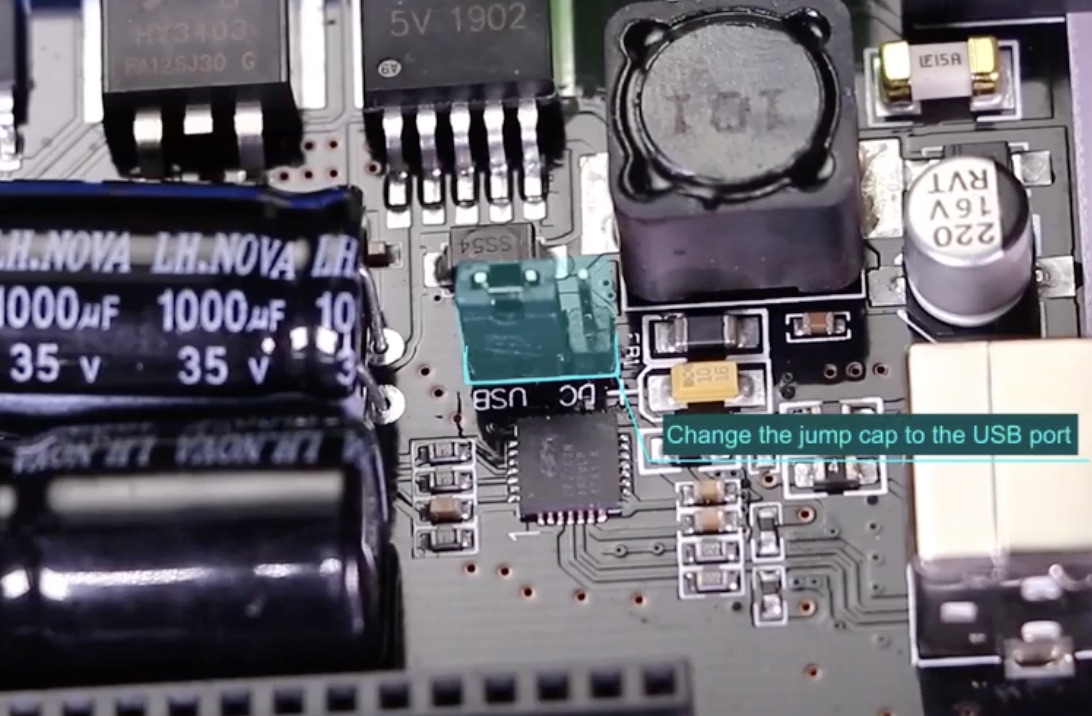
In a video on YouTube from Minitec 3D I found, that the board must first be flashed with a new firmware first. Therefore, the board was disconnected from power and the power source jumper needed to be changed from “DC” to “USB”.
Afterwards, the board was connected to a computer through USB, and the firmware could be uploaded. However, it wasn’t working with Cura out of the box, but after downloading pretty old versions of Cura (<= 15.04.06), it was possible to select the serial port. The version is still available for download. The serial port can be selected under File → Machine settings …, after that, I was able to upload the new firmware by selecting Machine → Install custom firmware…
I used Marlin-Ai3M-v1.4.6 maintained by davidramiro (Thanks a lot for that!!!). Since the newer firmware is using PWM to keep the heatbed at the correct temperature, this is putting additional stress on the heatbed mosfet and can destroy it. If you do this as well, I strongly recommend to add an external mosfet for the heatbed to your printer.